SHARP EDGES TUTORIALS: How to cover a cake and cake board with fondant or sugarpaste
Covering cakes with fondant is one of the essential basic steps in cake decorating. Whether you are a professional cake decorator or novice, trust me you are never too old to learn new tricks. In this tutorial, I will show you how I cover cakes and cake board with sugarpaste fondant and achieve a sharp edge on fondant cakes.
How to cover a cake with fondant or sugarpaste
I understand that my followers are from all over the world. Yes I know ….. Zimbabwe, UK, USA, Kenya, Nigeria and the rest of the world. Thank you all for your support. So allow me to try and explain the difference in types of cake covering found in these areas. In UK we call it sugarpaste, rolled icing, soft icing and fondant. I believe in Zimbabwe its plastic icing and America and Nigeria its fondant. My knowledge in this is very low but please leave a comment below and tell me what you call it in your country.
- Wash your hand and clean all your surfaces using a soap and water and dry with a clean white cloth or paper towel. This is the most important preparation step. if your surfaces ave any dirt or crumbs, this will will make your final fondant covered cake look dirty. Fondant is quite static so it picks up dirt from your hands and surface.
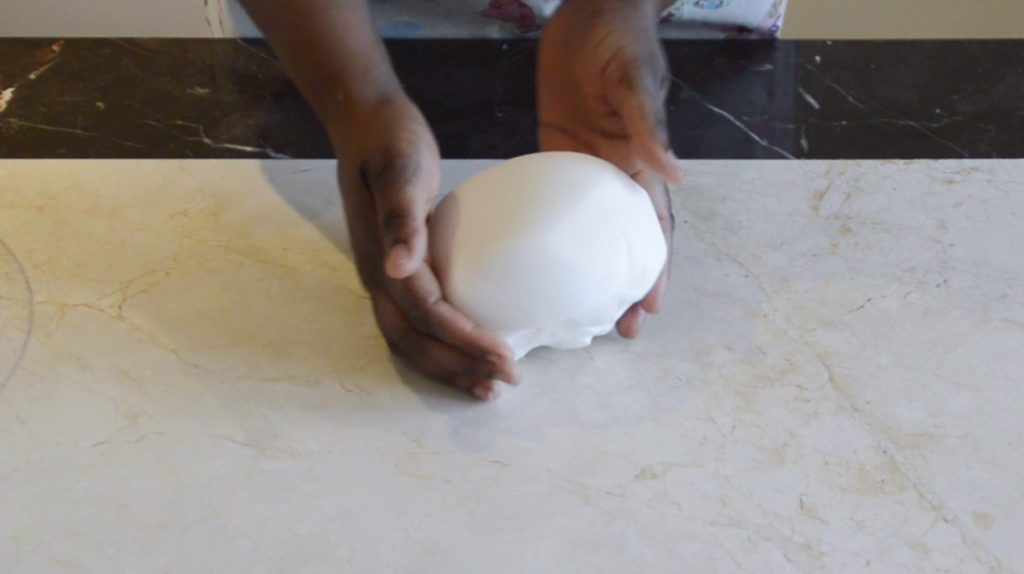
- Knead your fondant or sugarpaste until pliable. You can also add colour at this stage if you wish. Do not over knead or stretch your fondant as you do not want to introduce air pocket or over work your fondant. I knead my fondant in a ball.
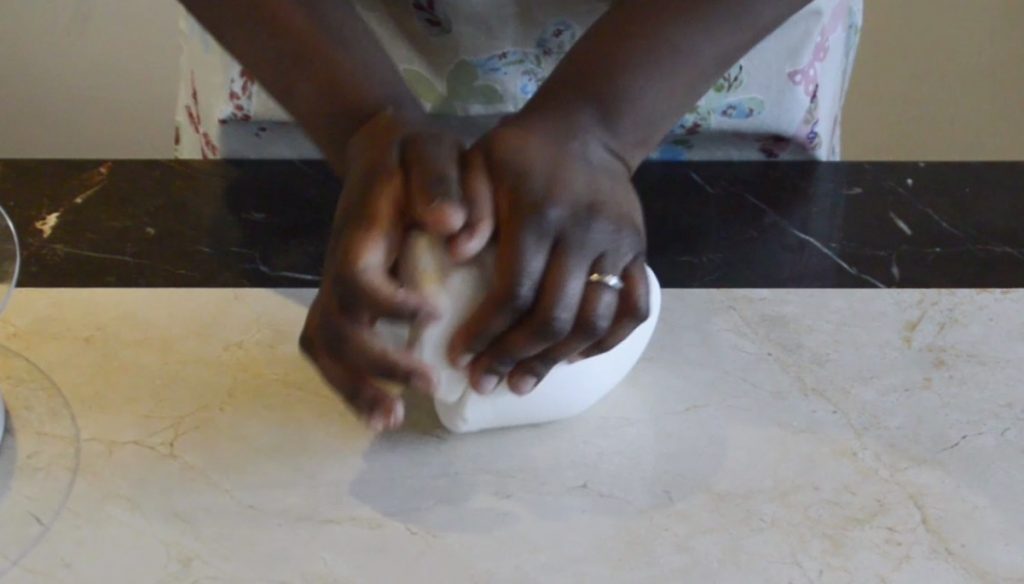
- Once your fondant is smooth and there are no cracks and splits when you fold it back then its ready to roll.
- Roll your fondant twice and rotate to keep the round shape, but do not flip the icing.
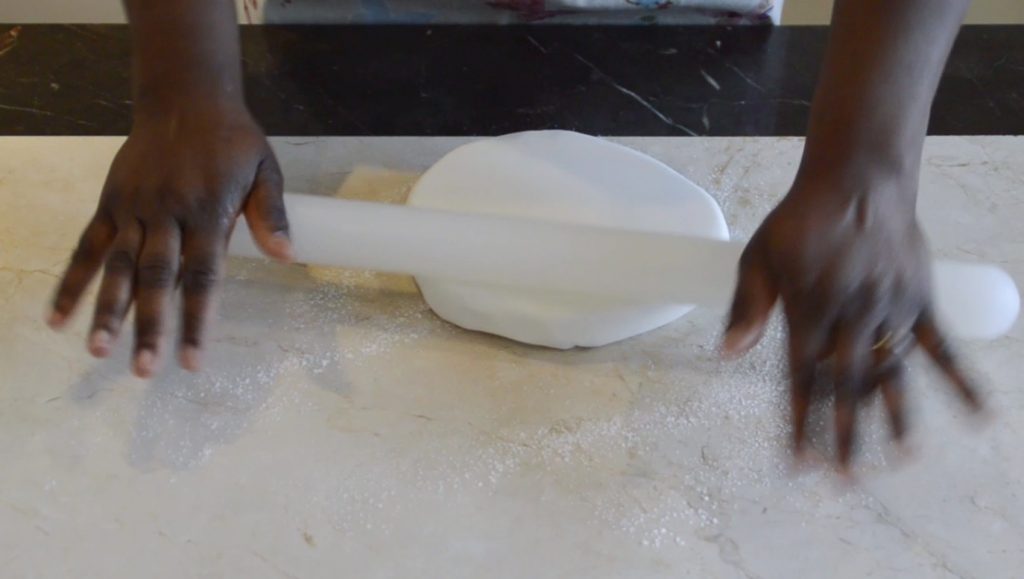
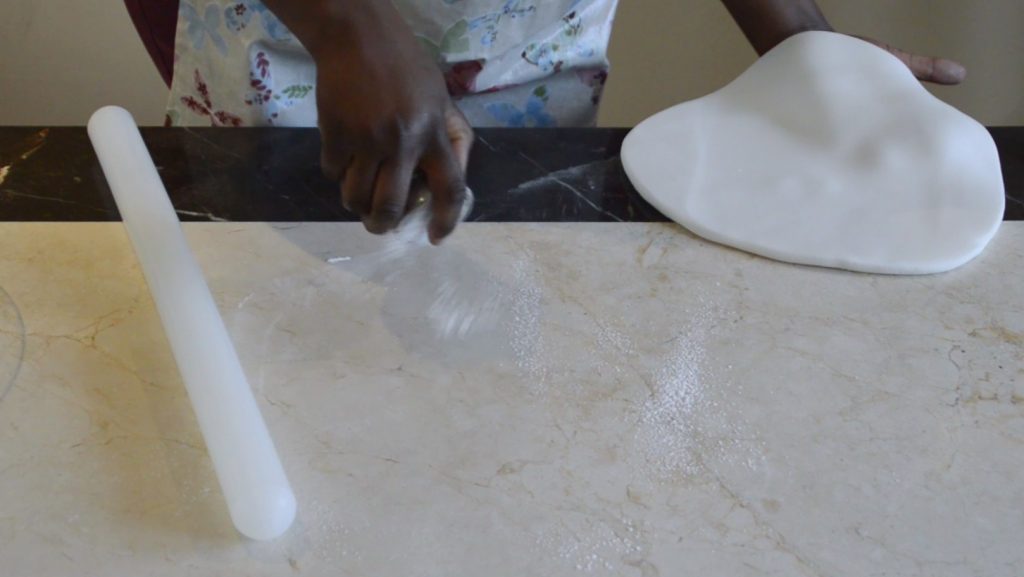
- If the fondant or the sugarpaste is sticking to the surface, sprinkle some icing sugar or cornflour only on the surface but not on your fondant as this can dry out your fondant or create elephant skin.
- Once you have rolled your fondant to the desired shape and size. Measure the cake diameter with a piece of ribbon and you want your fondant to be the same size as well.

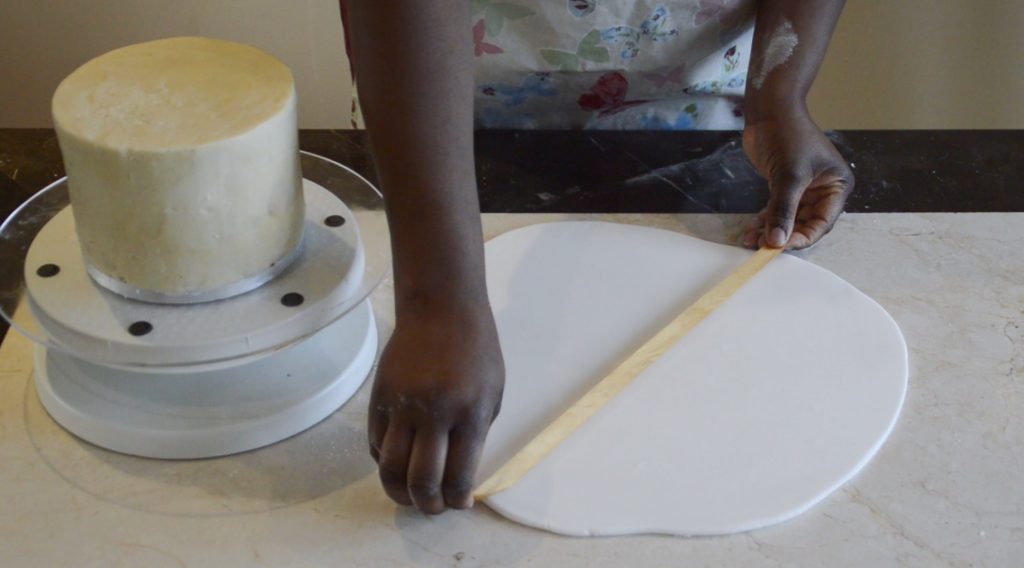
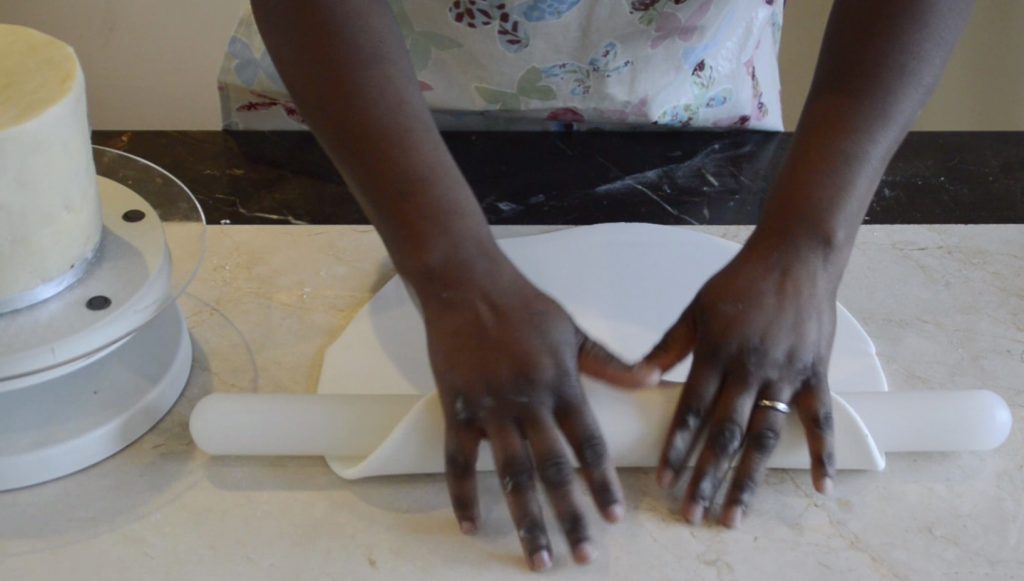
- Roll your fondant over your rolling pin.
- Drape the fondant or sugarpaste over your cake .
- Use white cake smoother over the surface first until flat and smooth.
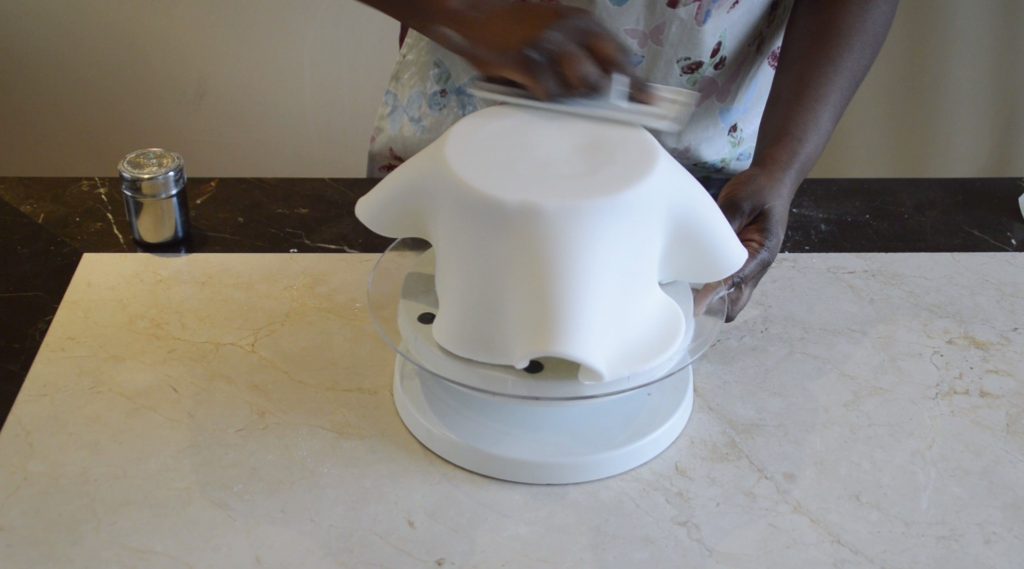
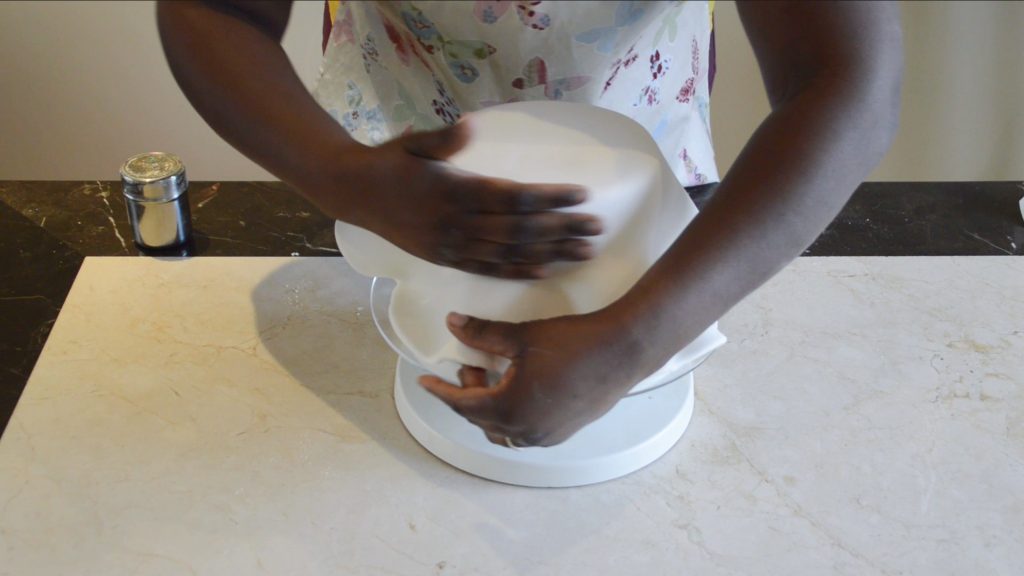
- Use the palm of your hands to gently press the fondant on to your cake.
- Gently lift the fondant pleats as you smooth the cake, starting from the top to avoid folds in the icing. Do not Pull at this cake break the icing .
- Use firm pressure to stick the fondant sugarpaste to the cake using two cake smoothers.
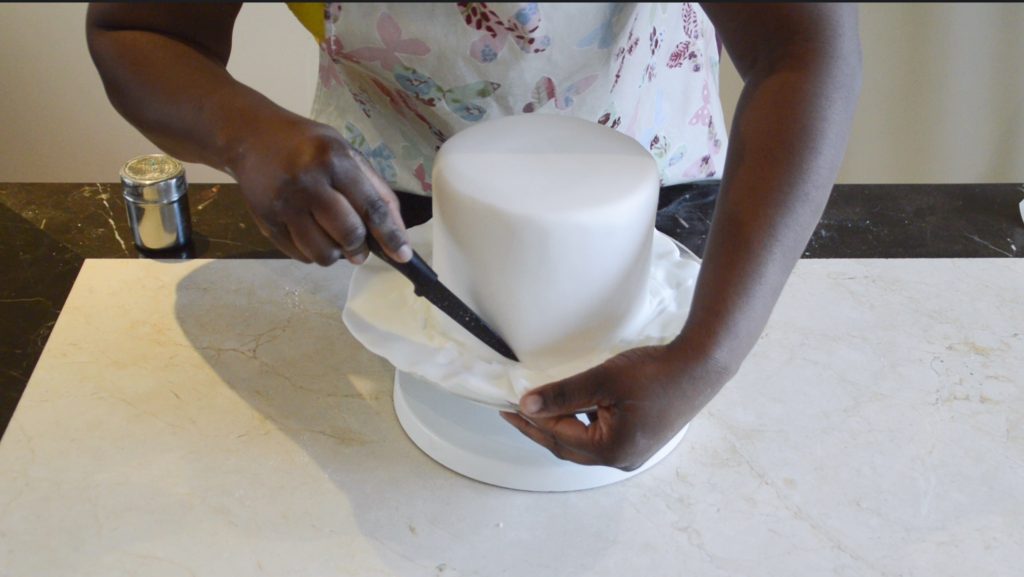
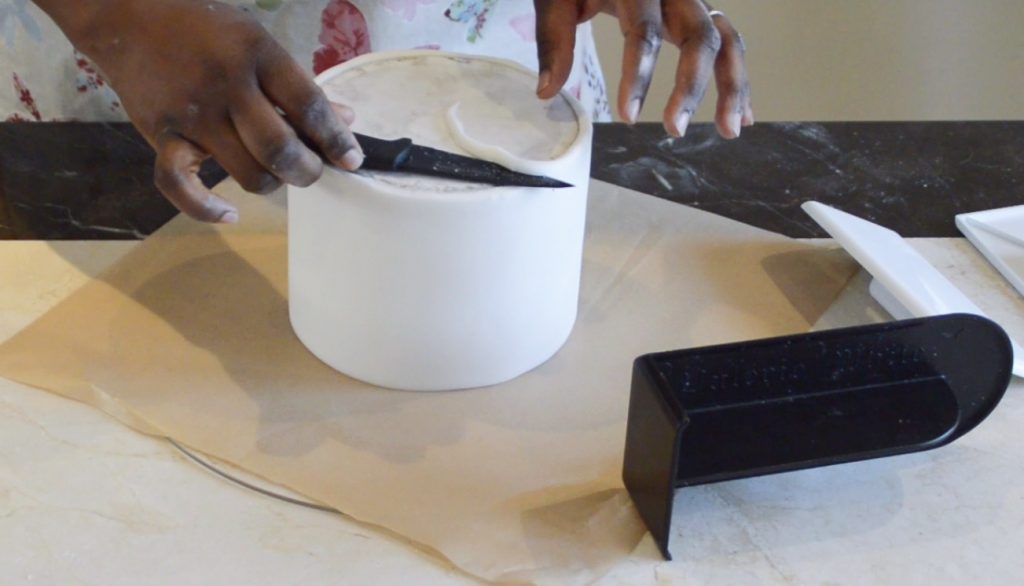
- Trim off the excess fondant with a sharp knife.
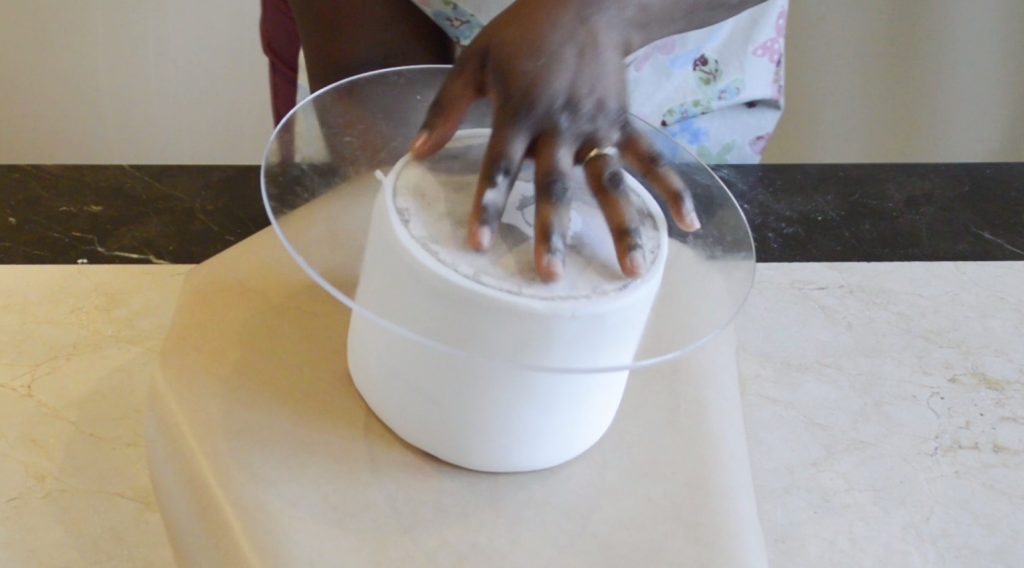
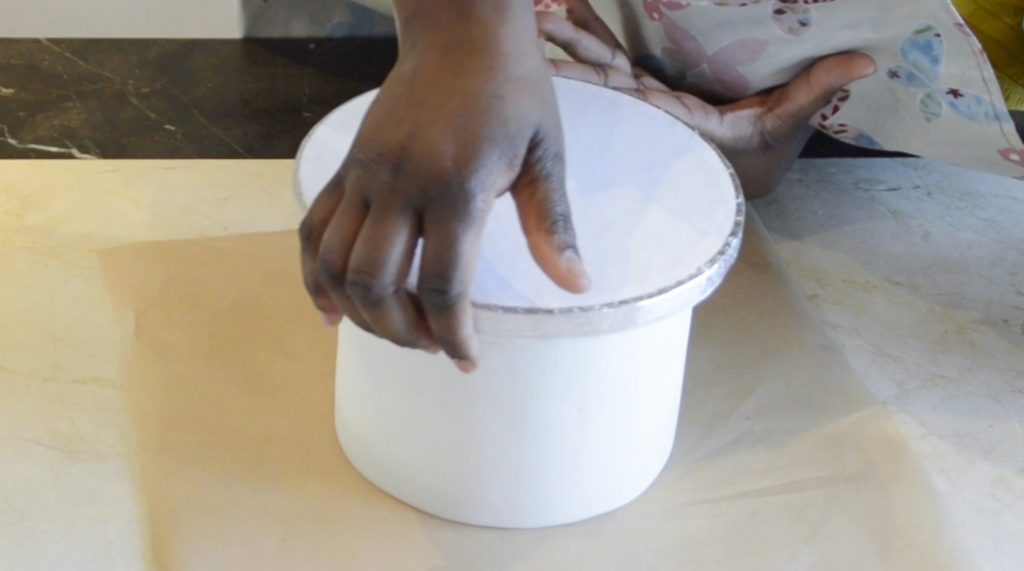
- Place a piece of patchment paper or greaseproof paper over the cake and place a rigid cake board or drum over it.
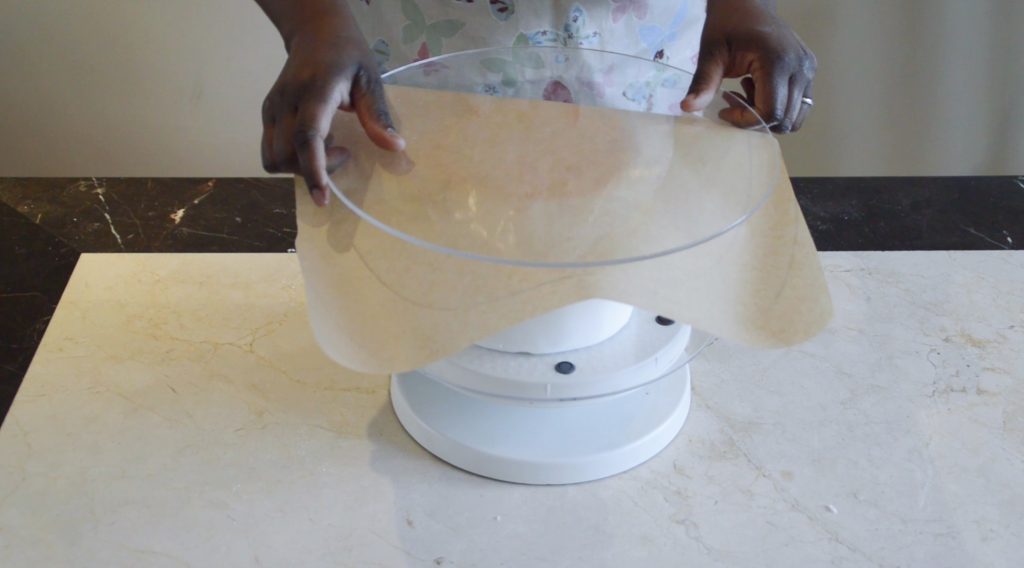
- Flip the cake upside down.
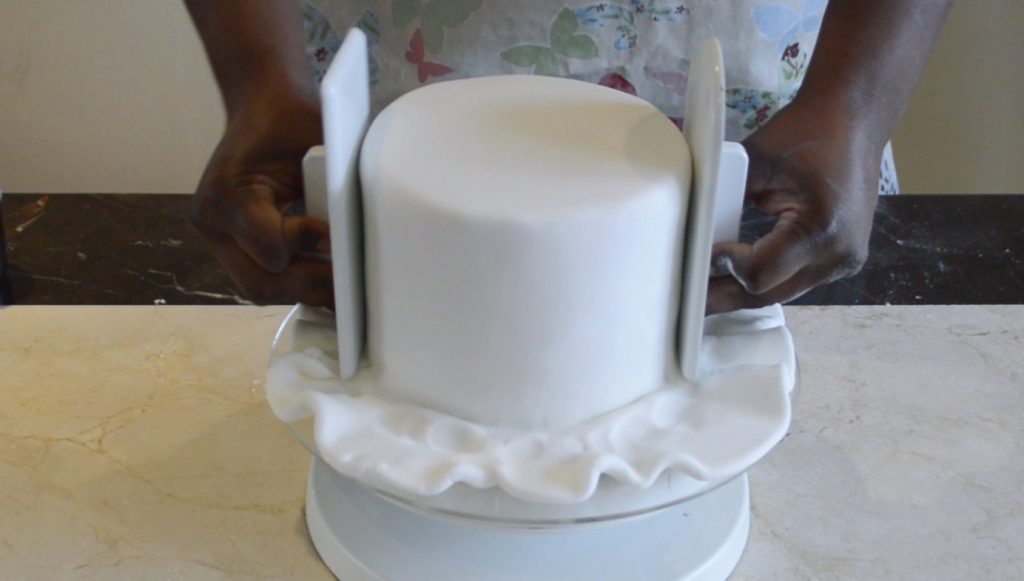
- Use round edge cake smoother to gently ease the fondant up and down the sides of the cake.
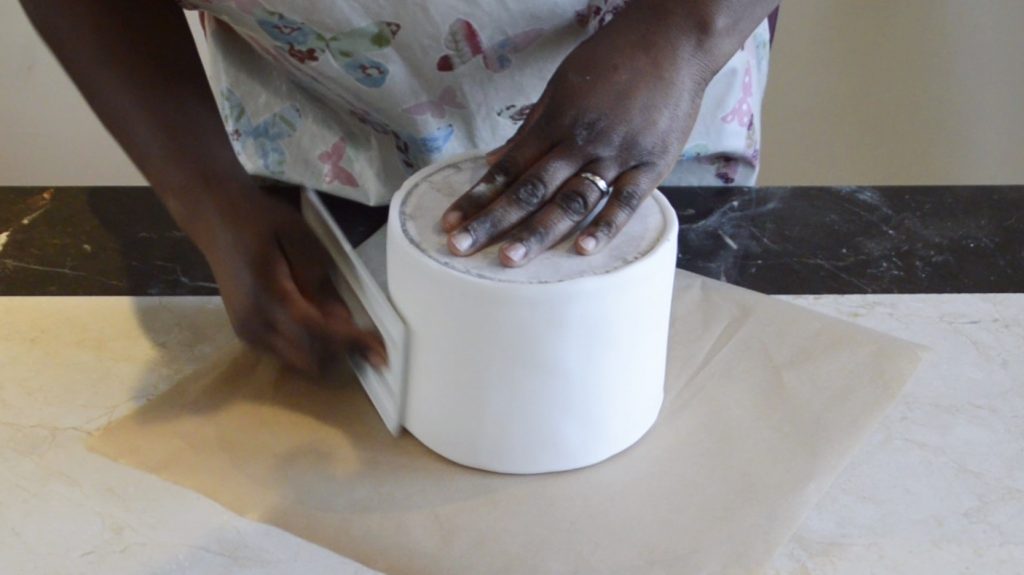
- The use the straight edge prestige smoother, this is my favourite as it sits on the board and cake at 90* degrees to give you a straight edge.
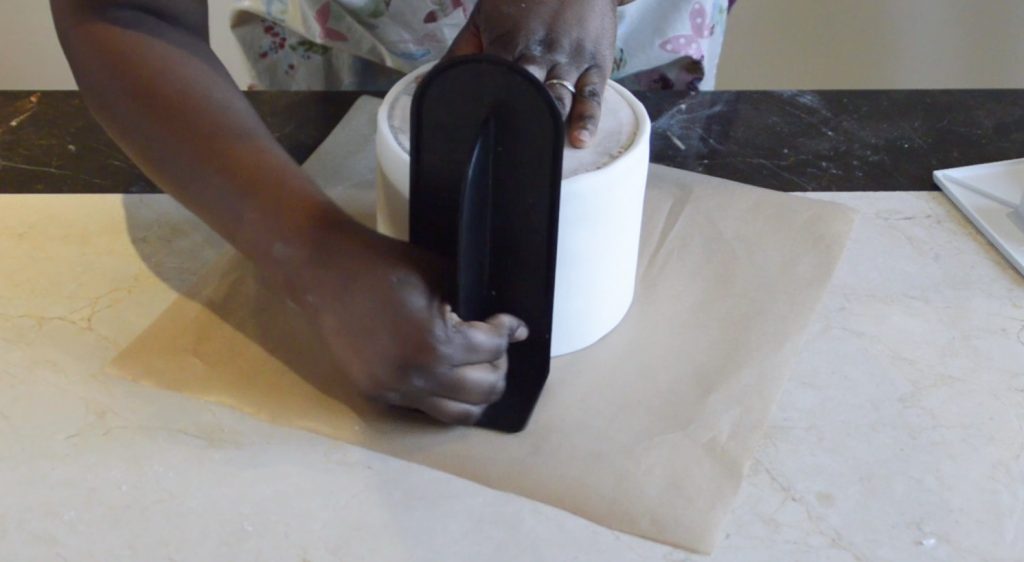
- Prick any air pockets or buldge with a sharp needle an smooth over. Make sure you do not make the hole too big.
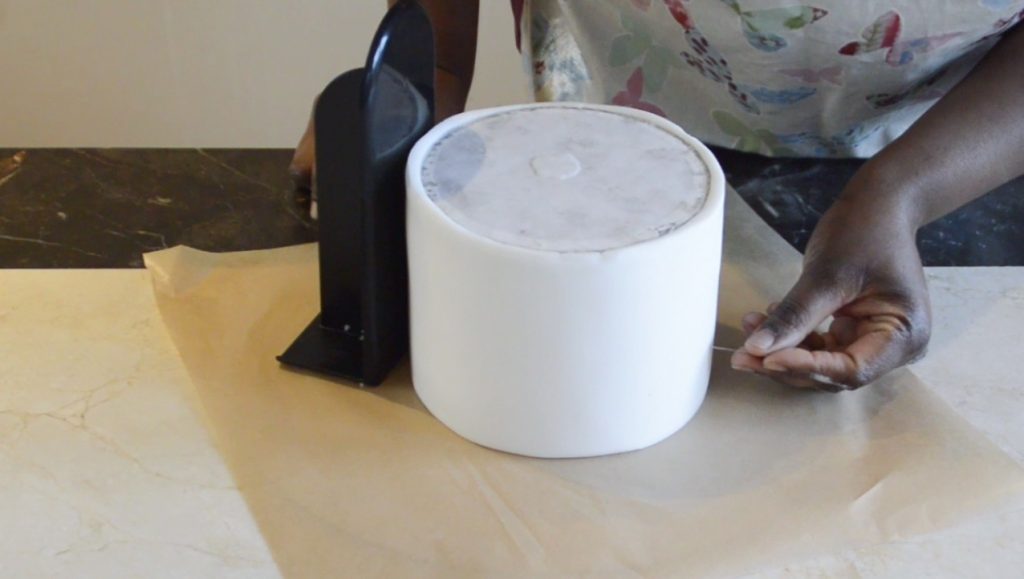
- Trim off The ecxess fondant over the board.
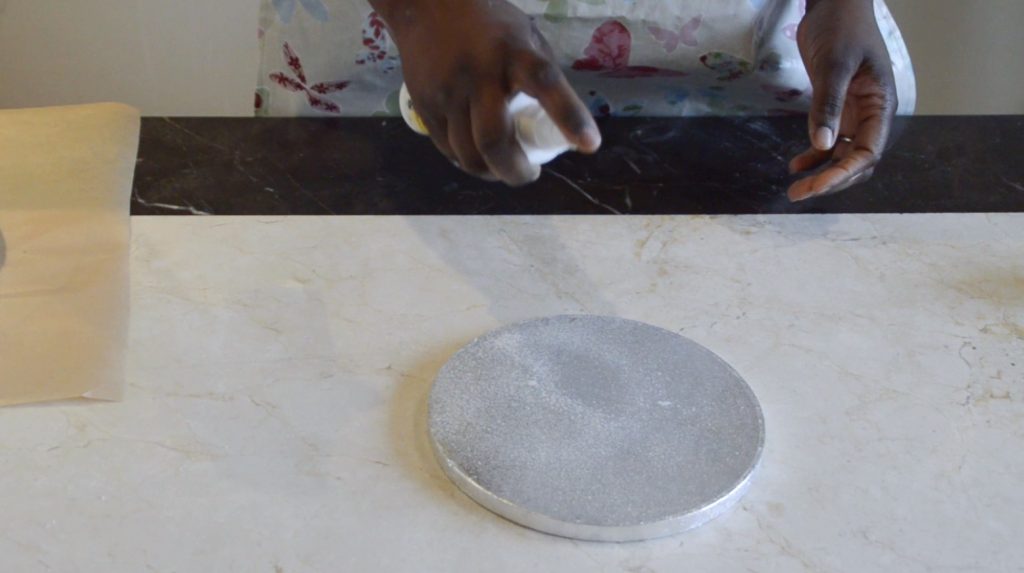
How to cover the cake board with fondant sugarpaste
- Spray the cake board with oil or rub with trex or crisco.
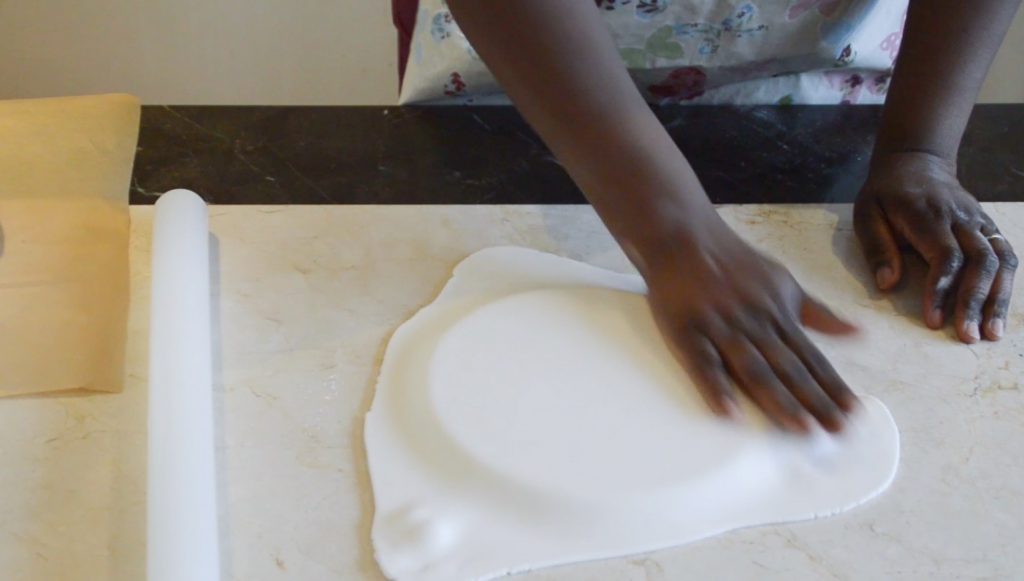
- Roll out the sugarpaste and drape it over the cake board and smooth the fondant.
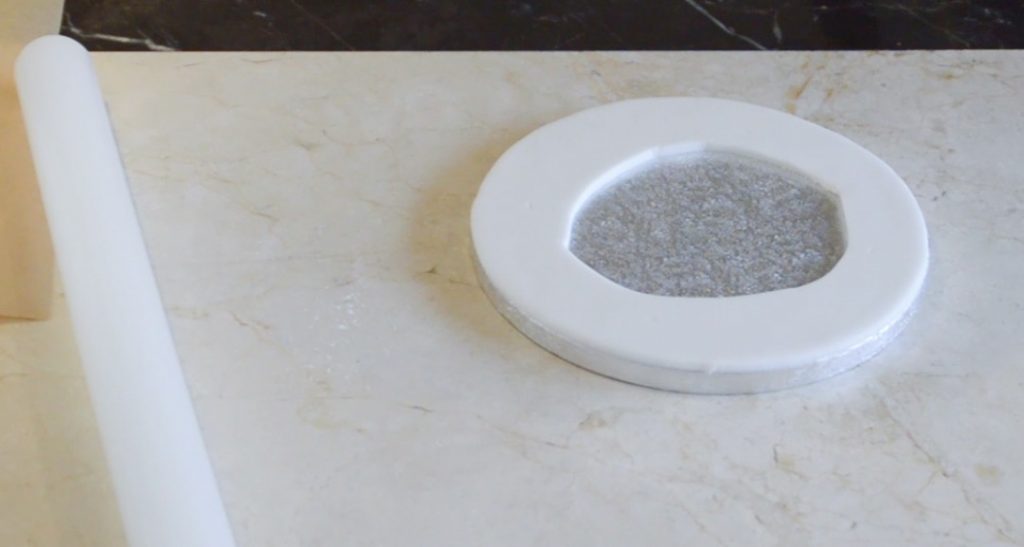
- Trim off the excess with a sharp knife
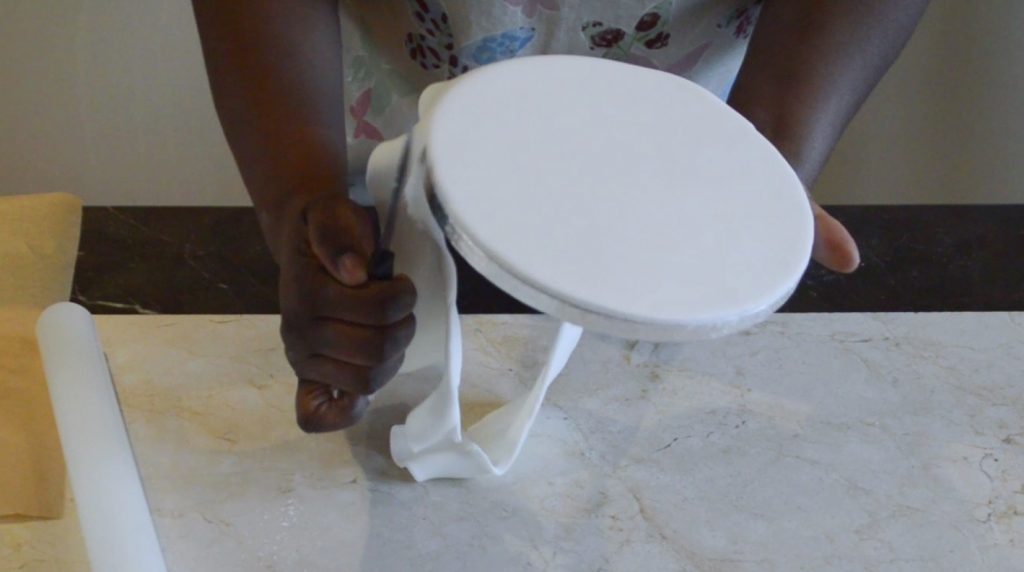
- Remove the fondant from the centre of the board as this is not required.
Assembling cake and board
- Place the decorated cake board over the upside down cake. If board is freshly iced then glue is not required. you can use water as glue if you want.
- Flip the cake right side up and remove grease proof paper and board from top.
- Add ribbon if desired. I always add ribbon to cake board, I think this complements the cake design very well.

Thats it……… done.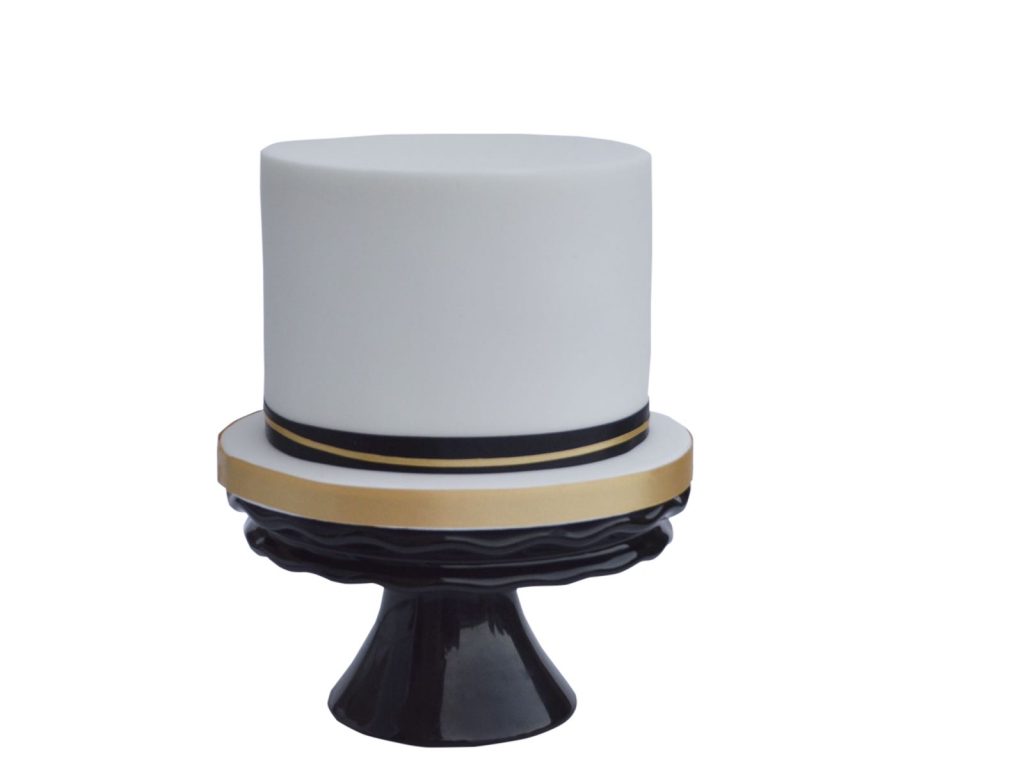
Give it a try with your next cake project and tell me how it went. feel free to share your pictures with me here or on facebook.
Tasneem
Nice dear. Thank you xx
Busi christian-iwuagwu
You are welcome
Ajayi oluwaseun
Thanks so much
Busi christian-iwuagwu
You are welcome
Patricia
Thanks for sharing this tips. I now understand better…
Busi christian-iwuagwu
you are welcome Patricia
Ng
Thank you. God bless
Busi christian-iwuagwu
you are welcome NG
Abioye
Thanks so much for sharing. However, I’m wondering, would this method work with large cakes, say 12″ or 14″ square cake?
Busi christian-iwuagwu
It works with all size. But to be really honest, it’s quite scary to flip a 14 inch cake
Mojirayo
Thanks so much
Busi christian-iwuagwu
You are welcome
Yemi
Thanks for the tip
Busi christian-iwuagwu
You are welcome
Joy
Wow great tips,thanks
Sally
Tnx so much maam,but wat if it’s a bigger cake
Ugoh
Thanks a lot for sharing this. The steps and pictures are so straight-forward and easy to understand.
sonia
Thank you so much